TallyPrime offers an excellent feature to manage different pricing for various customers, such as Distributors, Wholesalers, Retailers, and others. This is done using Price Lists and Price Levels. With this feature, businesses can streamline their sales process and automatically apply the correct price for each category of customers.
Price List are available only for inventory items and hence the feature is available only if Inventory and invoicing are activated for the company.
In this blog, we’ll explain how to use Price List and Price Level in TallyPrime with step-by-step instructions and practical examples.
What are Price List and Price Level in TallyPrime?
- Price List: A predefined list of prices for items based on different categories (e.g., distributor price, wholesale price, retail price).
- Price Level: Categories or groups created for different customer types (e.g., Distributor, Wholesaler, Retailer).
When you associate a price level with a customer, TallyPrime automatically applies the corresponding prices during sales transactions.
Why Use Price List and Price Level?
- Efficient Pricing: Automatically apply the correct price for different customers.
- Time-Saving: No need to manually calculate or apply discounts for each sale.
- Error-Free Billing: Reduces the chances of pricing errors in sales invoices.
Create Price Levels
You can create multiple price levels based on your customer categories:
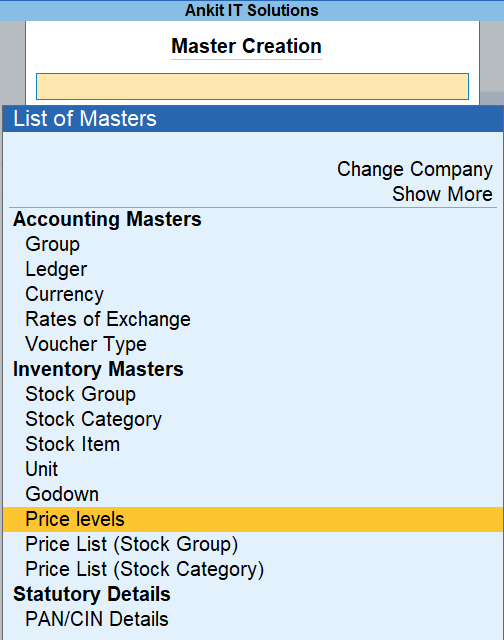
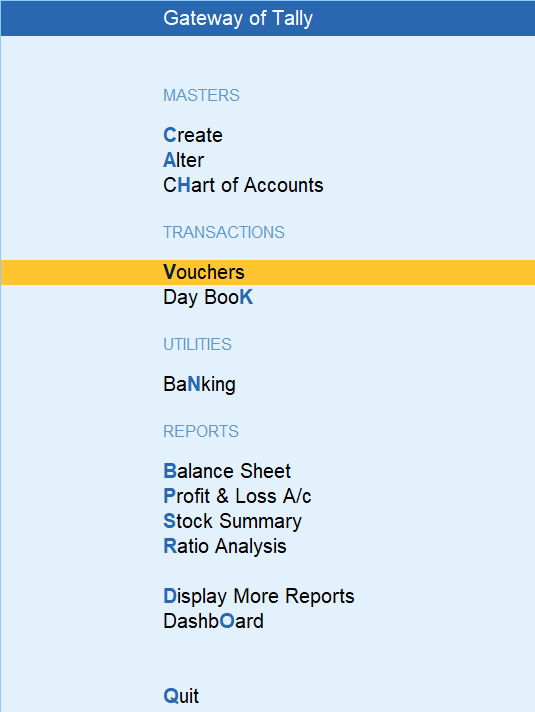
- Go to Gateway of Tally > Inventory Info > Price Levels > Create.
- Enter the names of the price levels, such as:
- Distributor
- Wholesaler
- Retailer
- Press Ctrl + A to save.
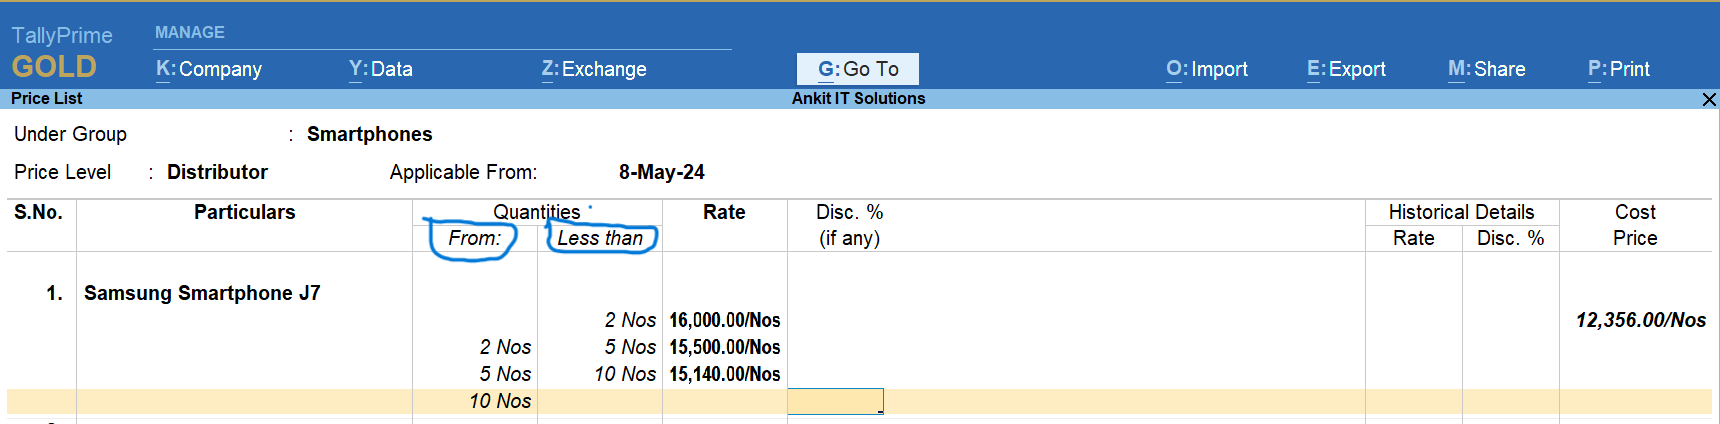
Step 3: Define Price List for Each Price Level
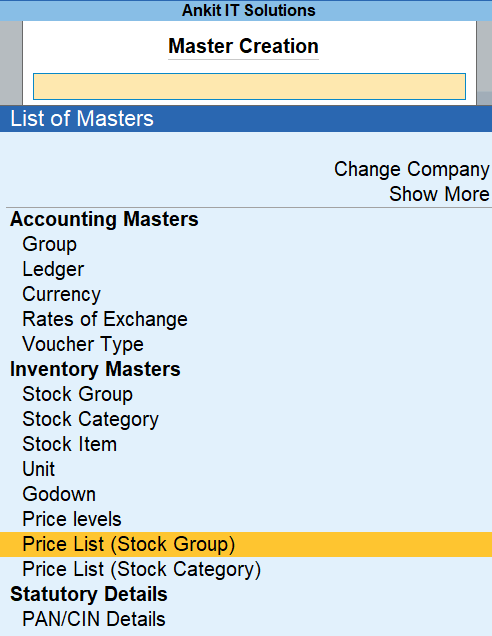
- Go to Gateway of Tally > Inventory Info > Price List.
- Select a Price Level (e.g., Distributor).
- Choose the item and unit for which you want to set the price.
- Enter the rates for each item. For example:
- Product A: ₹90 (Distributor), ₹95 (Wholesaler), ₹100 (Retailer)
- Product B: ₹150 (Distributor), ₹160 (Wholesaler), ₹170 (Retailer)
- Press Ctrl + A to save.
Repeat this process for other price levels like Wholesaler and Retailer.
Step 4: Assign Price Levels to Customers
- Go to Gateway of Tally > Accounts Info > Ledgers > Alter.
- Select the customer account (e.g., Distributor XYZ).
- Under the Price Level field, select the appropriate price level (e.g., Distributor).
- Save the ledger by pressing Ctrl + A.
Create a Sales Invoice
When recording a sales transaction, TallyPrime will automatically apply the price based on the customer’s assigned price level:
- Go to Voucher Entry > F8 (Sales).
- Select the customer (e.g., Distributor XYZ).
- Add the item details. The price list for the selected Price Level will be applied automatically.
- Save the invoice by pressing Ctrl + A.
Practical Example
Let’s consider a scenario where your business sells Product A and Product B. You offer different prices based on customer type:
| Product | Distributor (₹) | Wholesaler (₹) | Retailer (₹) |
|---|---|---|---|
| Product A | 90 | 95 | 100 |
| Product B | 150 | 160 | 170 |
Example Steps:
- Create price levels: Distributor, Wholesaler, Retailer.
- Define price lists for each product and price level.
- Assign price levels to respective customer accounts.
- Record a sales invoice for a retailer. The price for Product A will be ₹100, and for Product B, ₹170.
Benefits of Price List and Price Level
- Customer-Specific Pricing: Automatically apply different prices for distributors, wholesalers, and retailers without manual adjustments.
- Time Efficiency: Save time during billing by avoiding repetitive calculations.
- Flexibility: Easily update prices for specific categories of customers.
- Professional Invoicing: Maintain consistency and accuracy in billing.
Practice Assignments
Here are some tasks to help you practice:
- Create Price Levels: Distributor, Wholesaler, and Retailer. Define a price list for two products.
- Assign Price Levels: Link the Distributor price level to a customer ledger and record a sales invoice.
- Update Price List: Change the rate for Product A under the Retailer price level and test it in a sales invoice.
- Multiple Items: Add multiple products with different prices for each price level.
- Discounts: Introduce a “Festive Offer” price level with discounted rates and apply it to a customer.
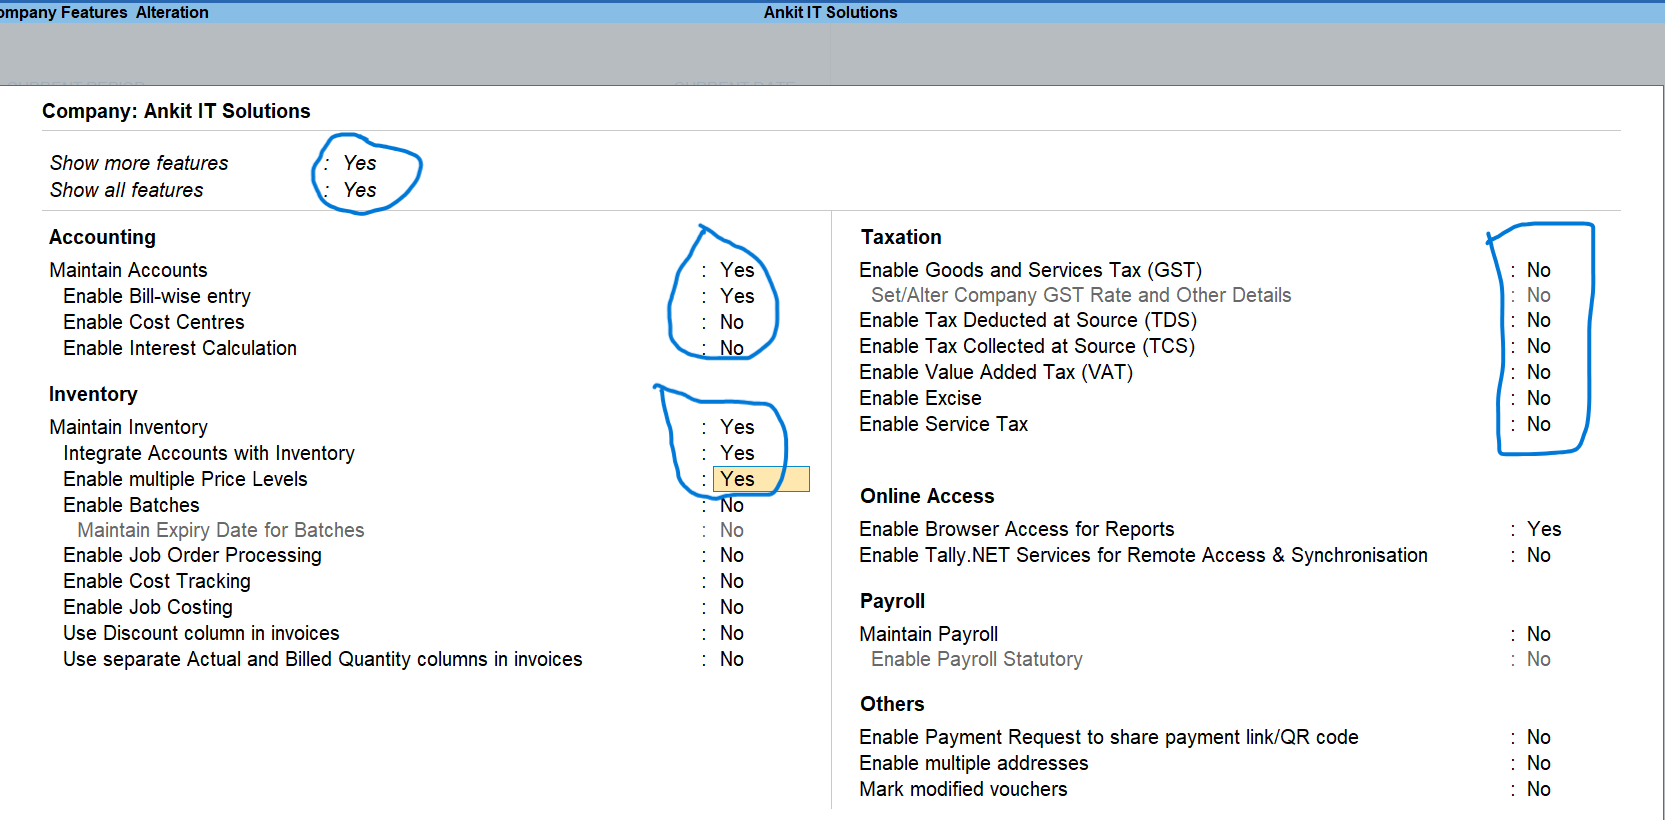
Enable Multiple Price Level by Pressing F11 Key
Click on Create
Create Following Stock Group

Click on Price Level
Create Following Levels

Click on Price List (Stock Group) to Setup Price
Fill Information for Distributor Price Level


Fill Information related to Item qty and rate or discount if any
Fill Information for Retailer Price Level

Fill Information related to Item qty and rate or discount if any

Fill Information for Whole Saller Price Level

Fill Information related to Item qty and rate or discount if any

Sale Stock Item with Distributer Price Level
Here You will see the item rate will automatically appear.
Gateway Of Tally >> Vouchers >> Sales


Sale Stock Item with Whole Saller Price Level
Here You will see the item rate will automatically appear.
Gateway Of Tally >> Vouchers >> Sales
